Configuring a CI/CD Pipeline using the Amazon Copilot CLI.
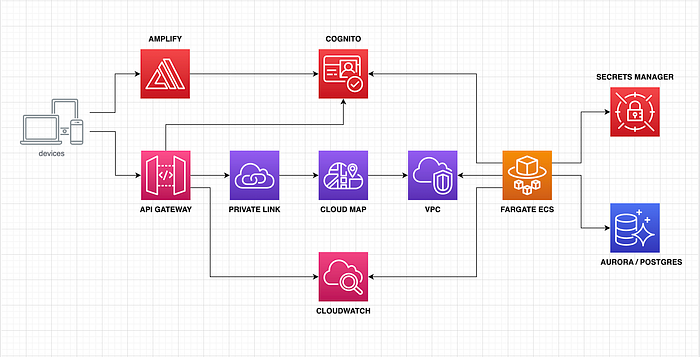
Now, it’s time to automate our Timer Service application’s build and deploy process into AWS. My previous article discussed unit and integration testing using the Quarkus framework employing JUnit and Testcontainers. So now, we’ll automate that process using a CI/CD pipeline using the Amazon Copilot CLI. But before doing that, let’s review significant changes in our Timer Service runtime architecture.
NOTES:
- The last changes I made in this project are detailed in a new article, “Implementing a Multi-Account Environment on AWS.” So I suggest you go to the new one after reading this article to see the latest project improvements.
- As usual, you can download the project’s code from my GitHub account to review the last changes made in the Timer Service FullStack application. You can also pull the docker image of the backend service from my DockerHub account if you wish to focus only on the backend side.
- Remember that I created an organization called “Hiperium” on both sites: GitHub and DockerHub. That’s why you can find the resources described in the previous note inside an organization on those sites.
Important Issues and Changes
When writing these lines, I found many problems when I tried to deploy the Timer Service on AWS using a pipeline. First, Java 17 is not supported yet by the CodeBuild service on any ARM64 AMI. Only Java versions 8 and 11 are supported at this moment:
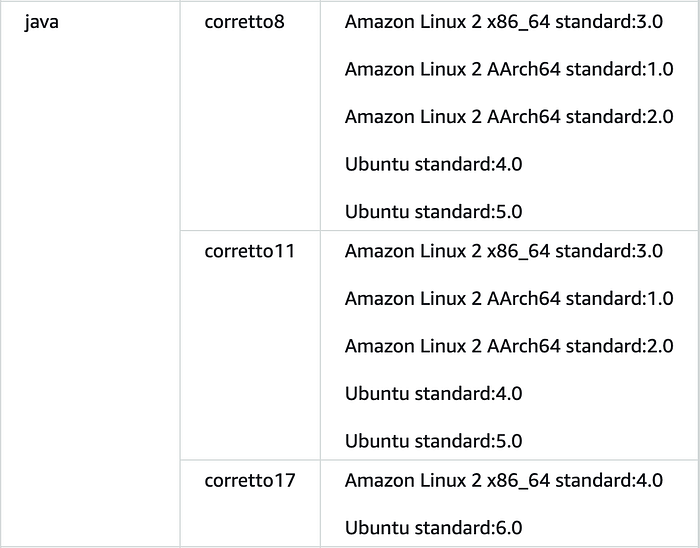
The workaround is manually installing and configuring Java 17 in the “install” phase of the CodeBuild process using the “buildspec.yml” file:
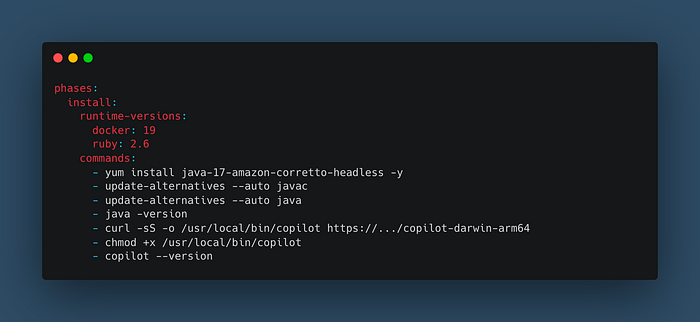
But this workaround takes time when the pipeline runs because the CodeBuild needs to download, install, and configure Java 17. All this before passing to the “build” phase. So this approach is not practical regarding build time for every moment the pipeline runs.
The other problem I was experimenting with was the Unit/Integration testing. I’ve errors at the start time of the Ryuk Tescontainer. It seems incompatible with the ARM64 arch in some runtime check processes, at least with the AWS CodeBuild service. The workaround to this issue is adding an environment variable that disables some Ryuk checks at runtime. It works well if you use the Docker Desktop tool in your local environment, but you can replicate this error using the Rancher Desktop solution (for the Apple Silicon chip version). We can specify this solution for the CodeBuild service using the “buildspec.yml” file:

And despite all these changes, some errors still appear in the console. So I was unhappy with all these problems and “possible fixes.” So, I migrated the Timer Service solution to a traditional x86_64 architecture in AWS, but you can modify the copilot configuration files to use an ARM64 chip for your needs.
IMPORTANT: My Apple Silicon chip’s workaround is to deploy only the backend executing the “run-scripts.sh” file on an AMD64 computer. Then, we can deploy the rest of the required infra to AWS using our ARM64 computers. Besides, we can deploy the app locally using Docker Compose, make some changes, and push them to GitHub to initialize de pipeline on AWS. As de pipeline was created previously, the changes will be compiled and deployed on AWS using the x86_64 compute architecture, which is transparent for us.
So, let’s continue with the tutorial.
To complete this guide, you’ll need the following:
- Git.
- An AWS account.
- AWS CLI (version 2).
- AWS Copilot CLI.
- GraalVM 22.1.0 with OpenJDK 17 (you can use the SDKMAN tool).
- Apache Maven 3.8 or superior.
- Docker and Docker Compose.
- IntelliJ or Eclipse IDE.
Installing the Amazon Copilot CLI
Well, first things first. We need to install the Copilot CLI on our computers. You can follow the instructions shown in this link. In my case, I need to follow a manual process because I have an ARM64 chip. So this is the command that I used:
# curl -Lo copilot https://github.com/aws/copilot-cli/releases/download/v1.22.1/copilot-darwin-arm64   && \
chmod +x copilot                                     && \
sudo mv copilot /usr/local/bin/copilot               && \
copilot --version
If everything is OK, you must see the version of the installed Copilot CLI command in your terminal window (v1.22.1 in this case).
Deploying the Timer Service
I updated some bash script files, including the main menu script. I deleted the Faker Data Generation option that populated data into DynamoDB. In a future tutorial, I will update this utility Java application to use a REST client to interact with the backend sending Faker data that the API must persist.
So, execute the main menu script to deploy the required infra in AWS:
# ./run-scripts.shThe new menu is the following:
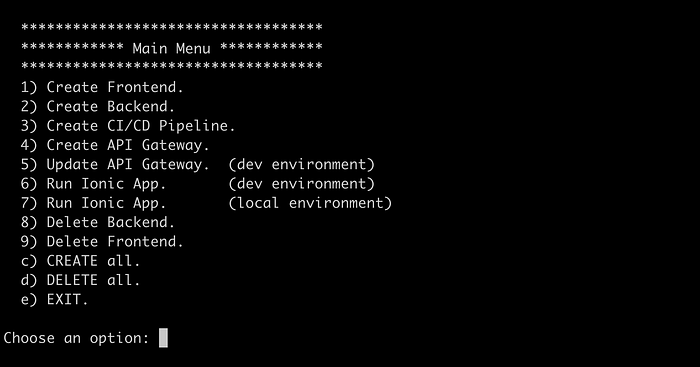
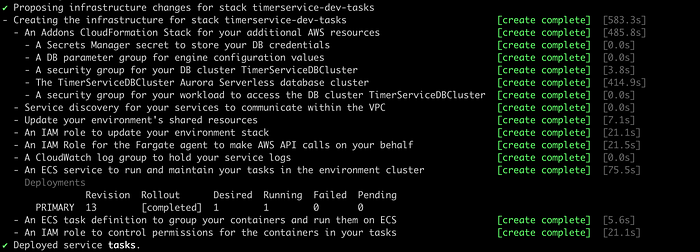
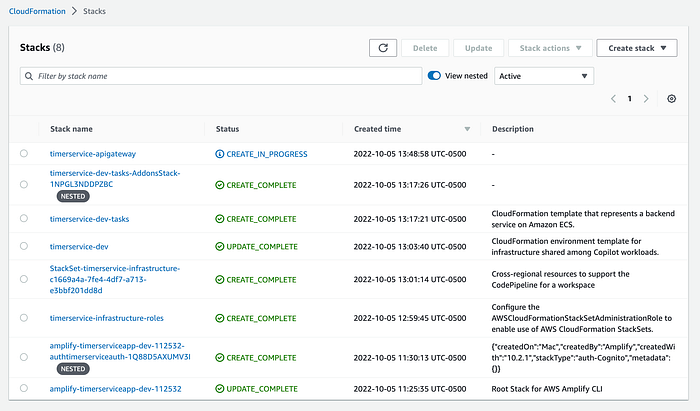
Choose the option “c” and press enter. Remember (as we saw in a previous article) that the script asks you for initial information that must be used to deploy and correlate some resources for our Timer Service. Here are some sequential screenshots of this automation process:
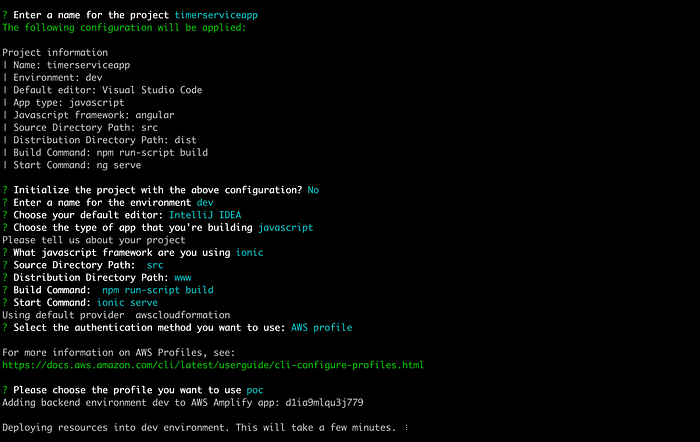
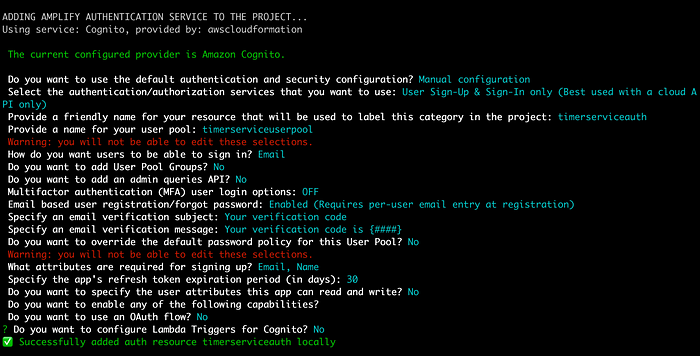
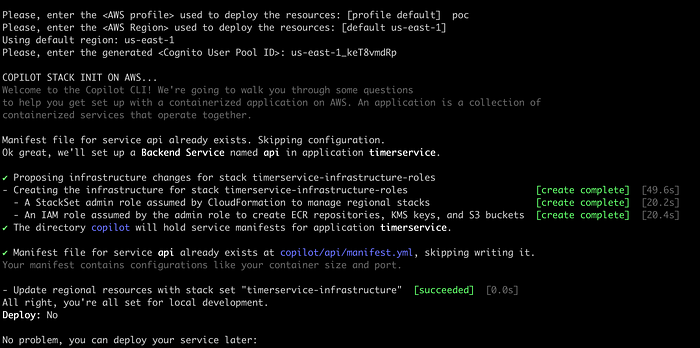


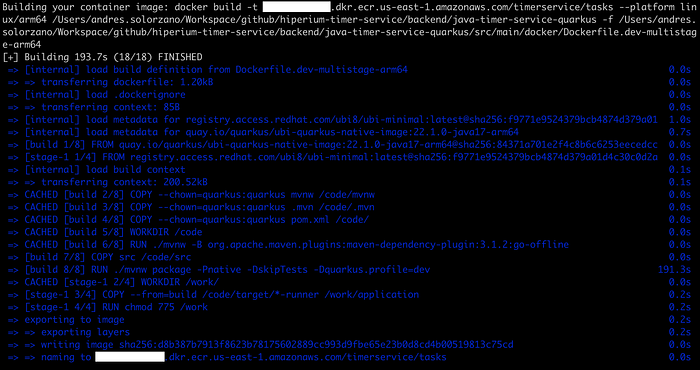


We need to update the “ApiGateway.yml” file in the “utils/aws/cloudformation” directory, adding your local IP address to the CORS configuration like this:
AllowOrigins:
  - 'https://main.d1ia9mlqu3j779.amplifyapp.com'
  - 'http://192.168.100.104:8100'
And also, in the “CorsLambdaFunction” section:
"Access-Control-Allow-Origin": "http://192.168.100.104:8100, https://main.d1ia9mlqu3j779.amplifyapp.com",Finally, we need to update the CloudFormation stack of our API Gateway to deploy this new configuration:
# aws cloudformation update-stack                                  \
  --stack-name timerservice-apigateway                             \
  --template-body file://cloudformation/1_ApiGateway.yml \
  --parameters                                                     \
    ParameterKey=AppClientIDWeb,ParameterValue=<value>             \
    ParameterKey=UserPoolID,ParameterValue=<value>                 \
  --capabilities CAPABILITY_NAMED_IAM
Check in the CloudFormation console if the “timerservice-apigateway” stack was updated successfully. So then, execute the following command in the “src/hiperium-timer-service-pwa” directory to deploy the Ionic App locally:
# http-server src/hiperium-timer-service-pwa/www -p 8100NOTE: If you haven’t installed the “http-server” tool, you can install it with the following command: “sudo npm install -g http-server”
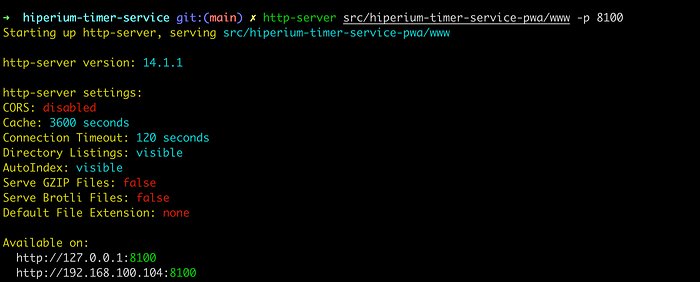
Copy and paste your local IP address into a new browser tab to access the application:
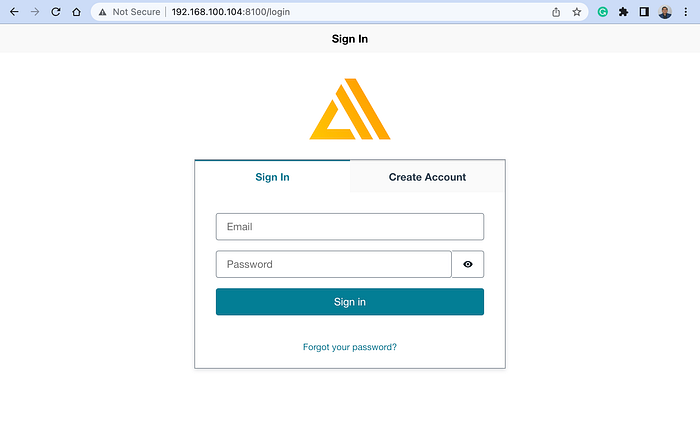
You must create a new user before accessing the application for the first time. So after doing that, you can gain access to the home page of our app:
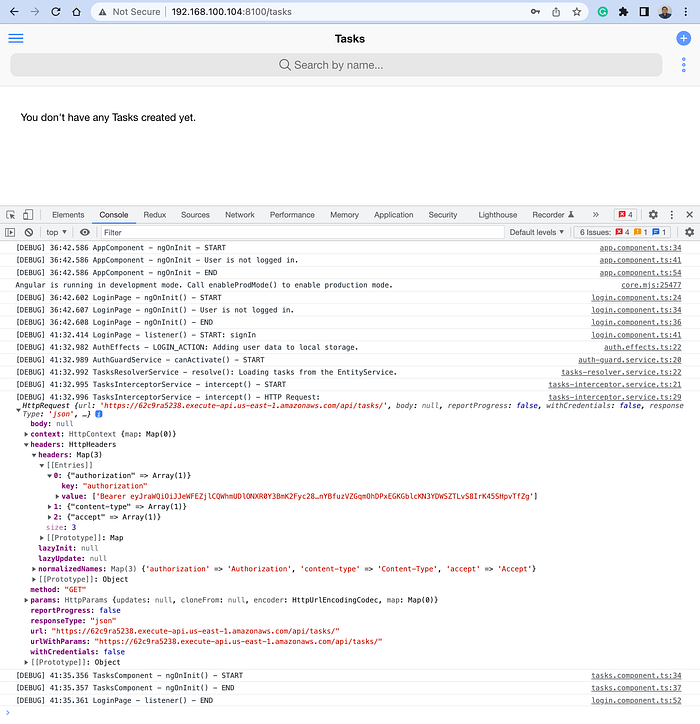
Notice that our local application is accessing the Tasks API endpoint generated by the AWS API Gateway. Also, the Interceptor service adds the JWT before calling the endpoint.
So now, let’s try to create a new Task to verify that the Task API service is working as we expect:
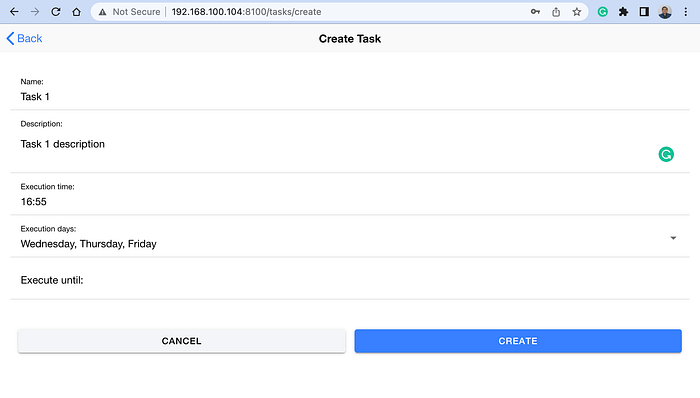
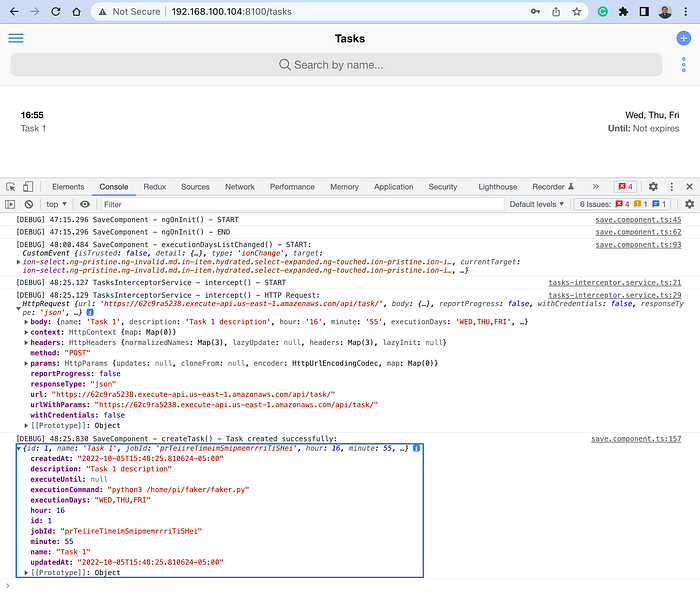
So far, we have verified that our Timer Service app is working. So log out your user from the app, stop the local HTTP server from your terminal window, and start configuring our CI/CD pipeline in the next section.
Creating a new CI/CD using AWS CodePipeline
So far, we have been using the Copilot CLI to deploy our changes to AWS, as shown in the following command:
# copilot deploy --app timerservice --env dev --name apiSo, our objective is to automate this process with a CI/CD pipeline and execute the unit and integration tests. First, run the following command in the project’s root directory:
# copilot pipeline initI entered the default values suggested by the command execution:
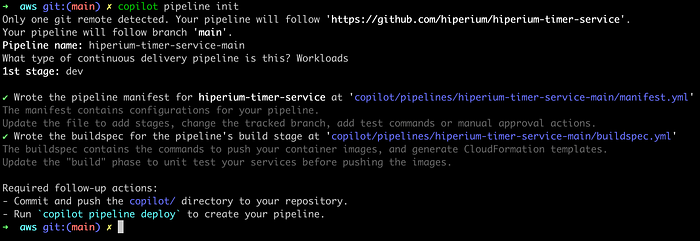
Here is an explanation of the values entered in the previous command, obtained from the Copilot CLI official website:
Pipeline name: We suggest naming your pipeline
[repository name]-[branch name](press 'Enter' when asked to accept the default name). This will distinguish it from your other pipelines, should you create multiple, and works well if you follow a pipeline-per-branch workflow.Release order: You’ll be prompted for environments you want to deploy to — select them based on the order you want them to be deployed in your pipeline (deployments happen one environment at a time). You may, for example, want to deploy to your
testenvironment first, and then yourprodenvironment.Tracking repository: After you’ve selected the environments you want to deploy to, you’ll be prompted to select which repository you want your CodePipeline to track. This is the repository that, when pushed to, will trigger a pipeline execution. (If the repository you’re interested in doesn’t show up, you can pass it in using the
--urlflag.)Tracking branch: After you’ve selected the repository, Copilot will designate your current local branch as the branch your pipeline will follow. This can be changed in Step 2.
Notice that the Copilot CLI creates a new directory and two files inside the “copilot/pipelines/api” directory called “manifest.yml” and “buildspec.yml.” The last one is the standard file used by the AWS CodeBuild service and has the following content:
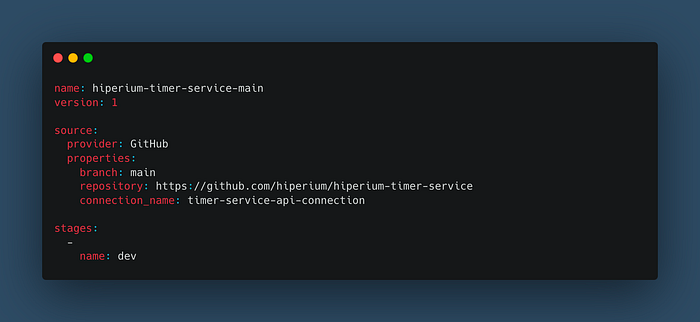
Notice that I declared a “connection_name” directive that the Copilot CLI will use to access the repository changes on GitHub. Your AWS user must have permission to create this connection resource on AWS, so I made a file called “codestar-connection-full-access-policy.json” in the “utils/aws/iam” directory that you can use to create that policy and then attach it to your AWS user before building and deploying the Copilot CLI Pipeline:
# aws iam create-policy                                      \
  --policy-name CodeStarConnectionsFullAccessPolicy          \
  --policy-document                                          \
    file://iam/codestar-connection-full-access-policy.json
Remember that it is not a good idea to use your root account to perform all these deployment activities, so I am sharing with you all the permissions that I have until now to deploy all the required resources for the Timer Service application:
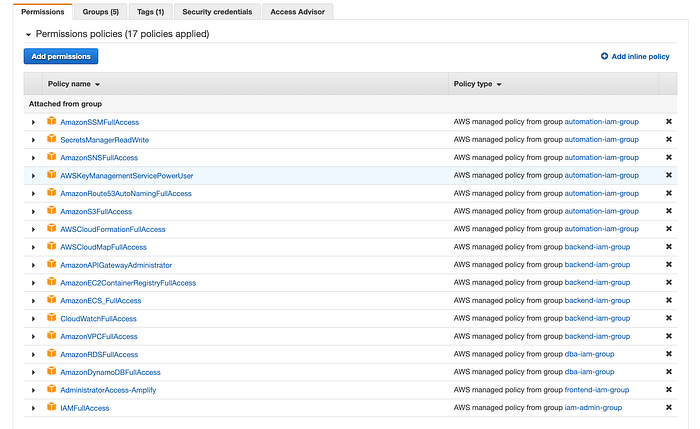
All these 17 policies are distributed in 5 User Groups in my user account. So in my case, I need to attach the created “CodeStarConnectionsFullAccessPolicy” policy to one of my user groups:
# aws iam attach-group-policy                                      \
  --policy-arn                                                     \
    arn:aws:iam::12345:policy/CodeStarConnectionsFullAccessPolicy  \
  --group-name automation-iam-group
Now, we must create the required CodeStar Connection resource in AWS:
# aws codestar-connections create-connection          \
    --provider-type GitHub                            \
    --connection-name timer-service-api-connection
Go to the “Developer Tools” on the AWS console and select the “Connection” option in the side menu:
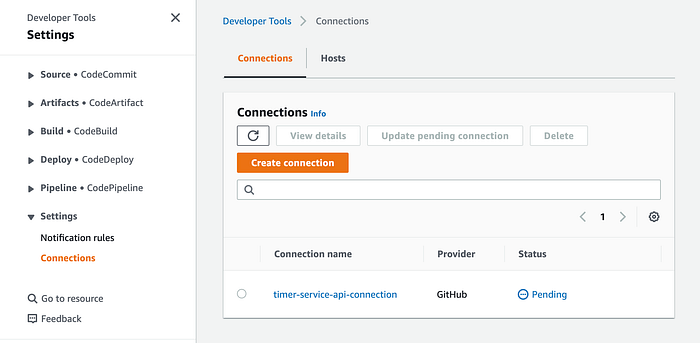
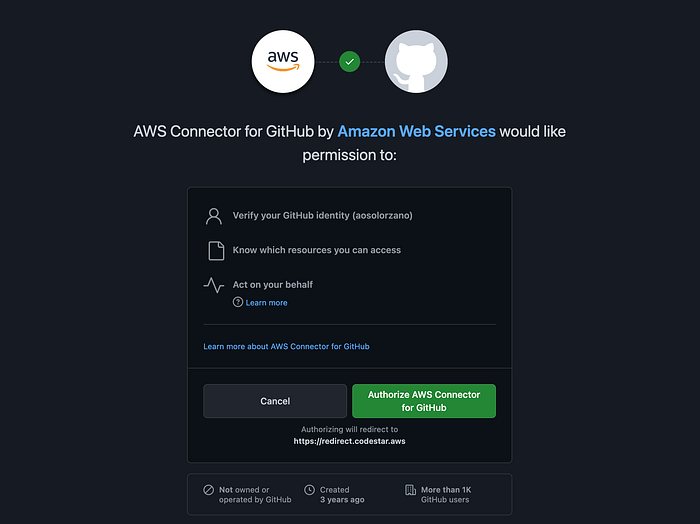
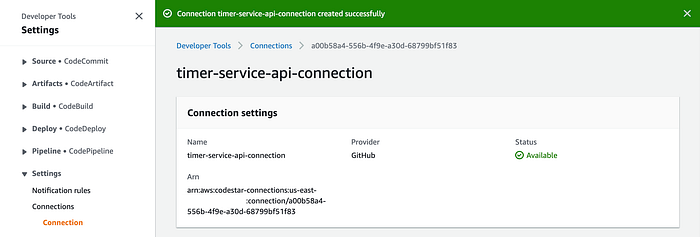
You will see that our Timer Service connection has a “Pending” status. To activate the connection, we need to perform a manual procedure. First, click on the connection name link and then click on the “Update pending connection” button. This action opens a new browser tap on the GitHub website asking for your approval to allow the CodeStar service to access your Git repositories:
Then, you will be redirected to the AWS console:

You must create a new GitHub App, so click on the “Install a new app” button. You will be redirected to the GitHub website:
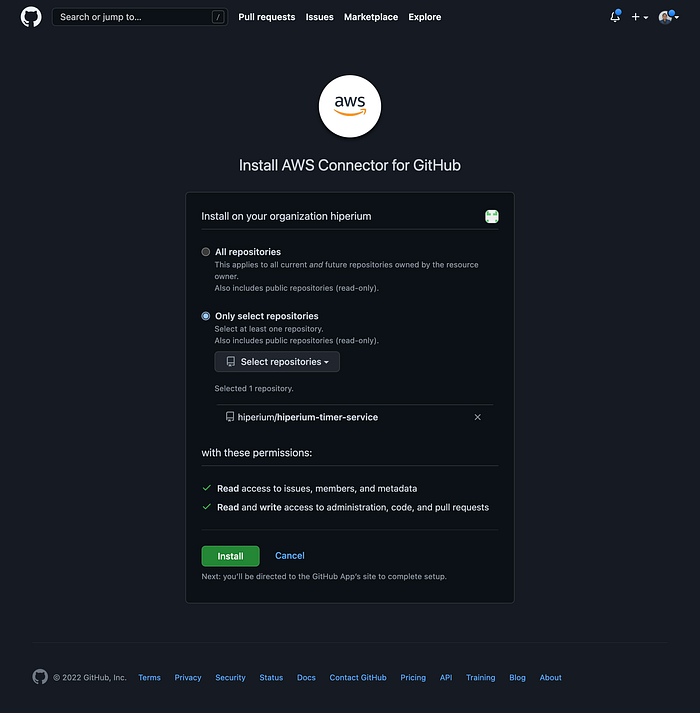
Select all the repositories that you want to allow access to the CodeStar service. In our case, I selected the “hiperium-city-tasks” repository inside the “Hiperium” organization.
When you click on the “Install” button, GitHub generates an ID number that the CodeStar service can use to access the indicated git repository:
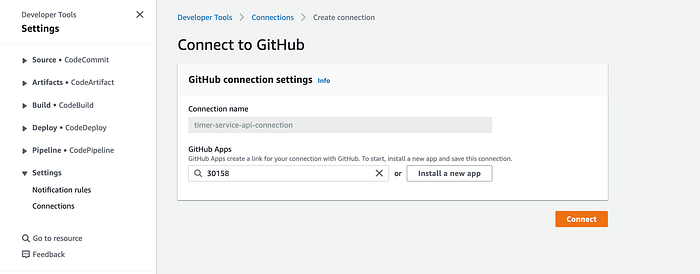
Click on the “Connect” button to finish the connection configuration and activation:
The other essential AWS policies that we need to attach to our user groups are the following:
- AWSCodeBuildAdminAccess.
- AWSCodePipeline_FullAccess.
So, until now, we have the following AWS policies required to deploy our Timer Service App on AWS:
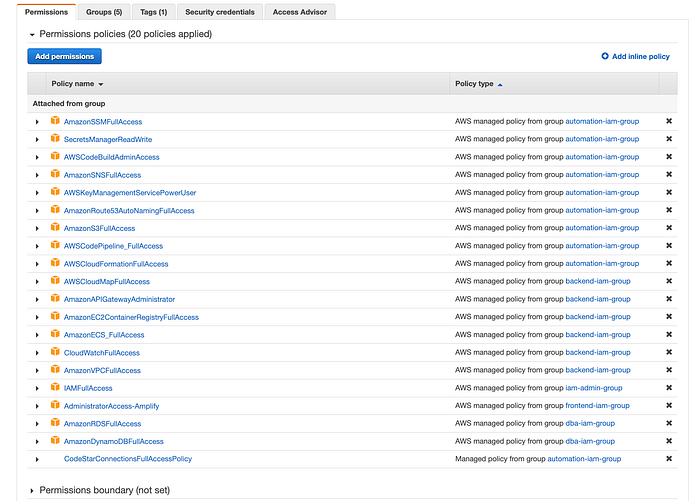
Notice at the end of the list our custom policy created previously must appear.
Now, we can deploy our pipeline using the following command:
# copilot pipeline deployIf you go to the CloudFormation service, you can see the created resources on AWS as a result of the previous command execution:
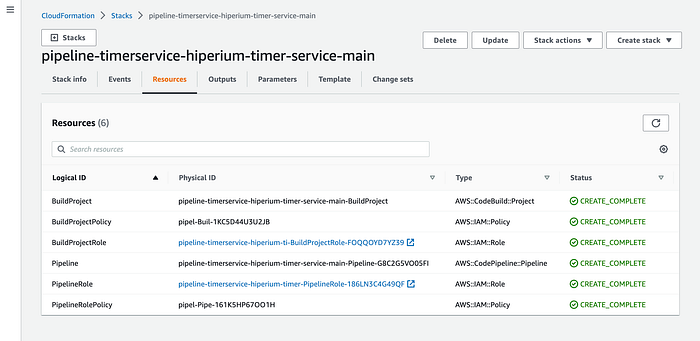
Notice that the command creates resources like IAM, the CodeBuild project, and the pipeline. Let’s go to the AWS “Developer Tools” to see our created Pipeline:
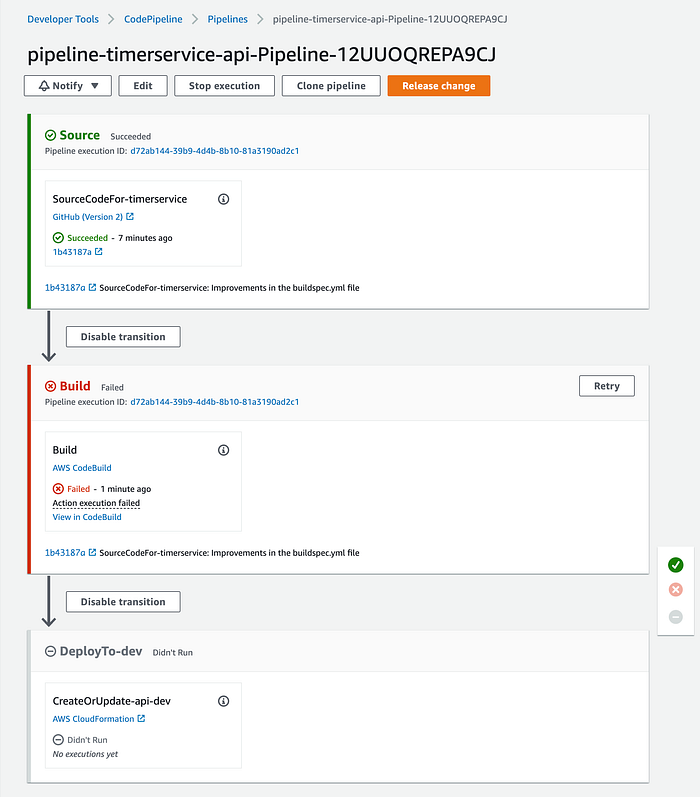
We have an error in our pipeline’s “Build” phase. You can go to the “Build Logs” section in the CodeBuild service to see what happened:
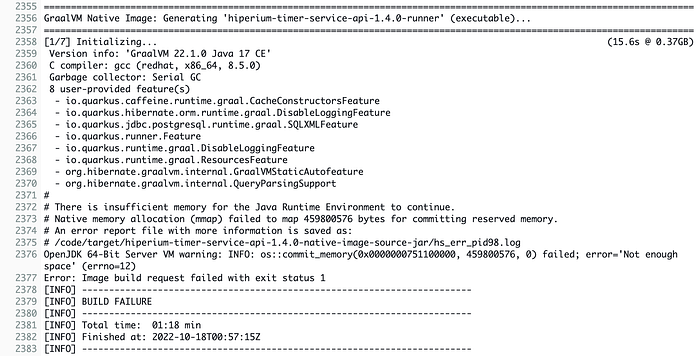
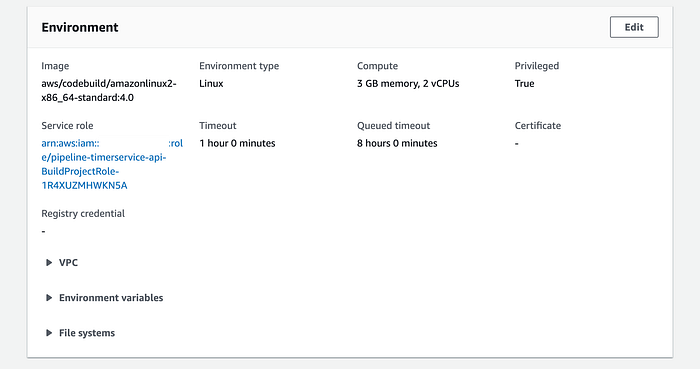
The error is based on a memory allocation issue by our CodeBuild AMI to generate the Java native executable. If you go to the “Environment” details of the CodeBuild project for our Timer Service, you will see that the Amazon Copilot CLI creates the project using the default computer type:
We can corroborate that with the following table issued by AWS with the available computer types for the CodeBuild service:

The Copilot CLI used the default “Linux Small” compute type for our Codebuild service (3 GB of memory and 2 vCPU). So we need to use the next compute type (the “Linux Medium” type) for our pipeline, which uses 7 GB of memory and 4 vCPU. I’ve created a file called “update-codebuild-project-info.json” in the “utils/aws/codebuild” directory, which contains the new property value that we want to update:
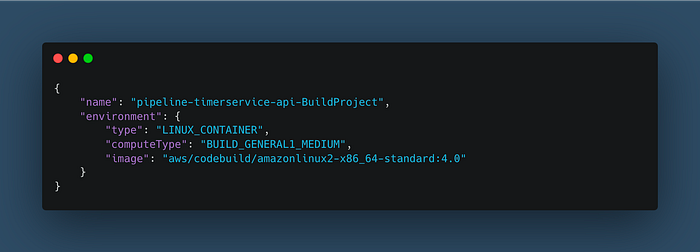
Then, execute the following command to update our CodeBuild service on AWS:
# aws codebuild update-project --cli-input-json file://utils/aws/codebuild/update-codebuild-project.jsonThe updated project JSON appears in the output if the update is successful. You can also go to the CodeBuild service again to validate if the compute type value was changed:

Now, go to our AWS CodePipeline service and click on the “retry” button to execute the “Build” phase again:
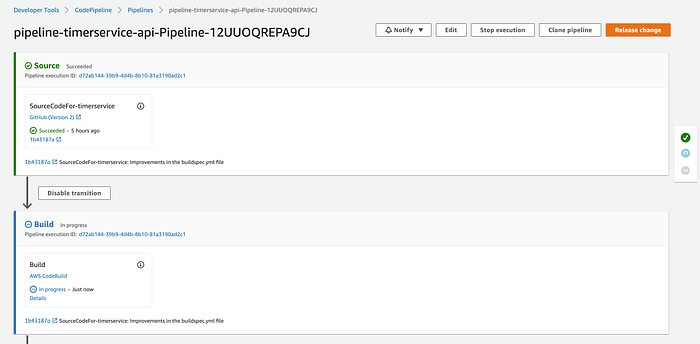
Click on the “Details” link to go to the CodeBuild service to see the results of the phase execution:

Click on the “Tail logs” button to see the last logs in action:
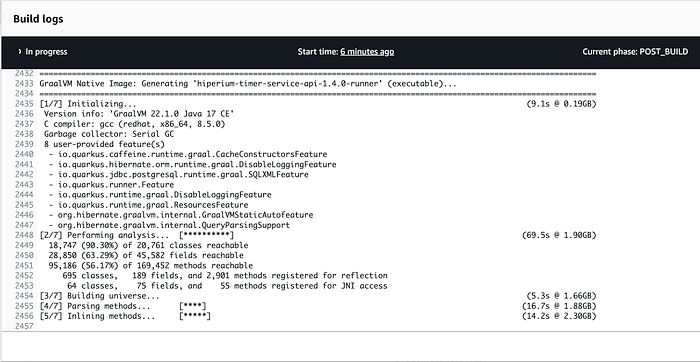
As you can see in the previous image, the Quarkus framework is now generating the Java native executable without any problems. At the end of the build execution, you can see the result of the execution of all phases in the build process:
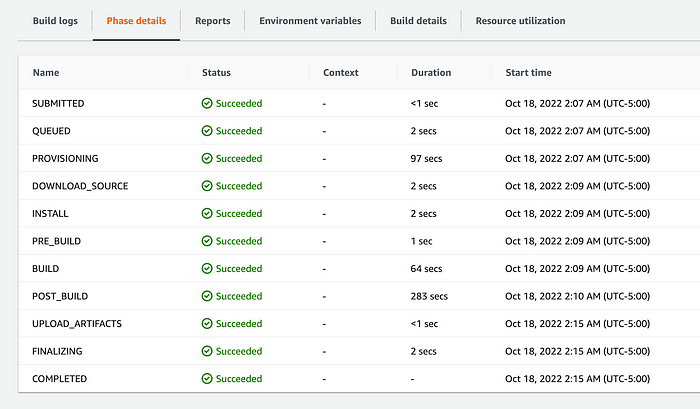
And now, the pipeline has no errors and is ready to use:
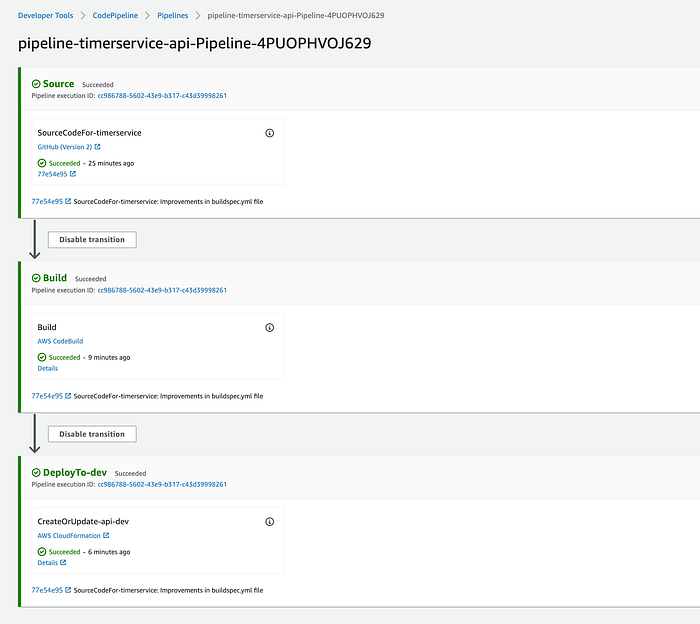
In the next section, we will make some code updates and rerun the pipeline with the new changes.
Executing the pipeline automatically.
When I ran the project locally at the beginning of the tutorial, I noticed that the logs of the “execute” method printed some errors when the Quartz Job was triggered.

So let’s start modifying this method located in the “JobExecutionService” class with a more traditional style:
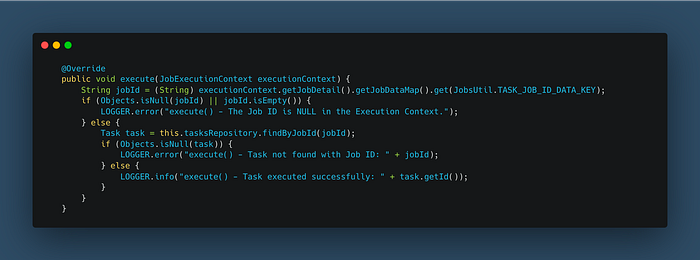
NOTE: Remember that you can update this method to call other services in your installations or the Cloud.
After finishing this refactoring, we can see in the terminal window the following logs when a task executes its Quartz Job:

Let’s commit these changes to GitHub to rerun our pipeline:
# git add .
# git commit -m "<your_comments>"
# git push
Go to the CodePipeline service to see the execution of our pipeline:
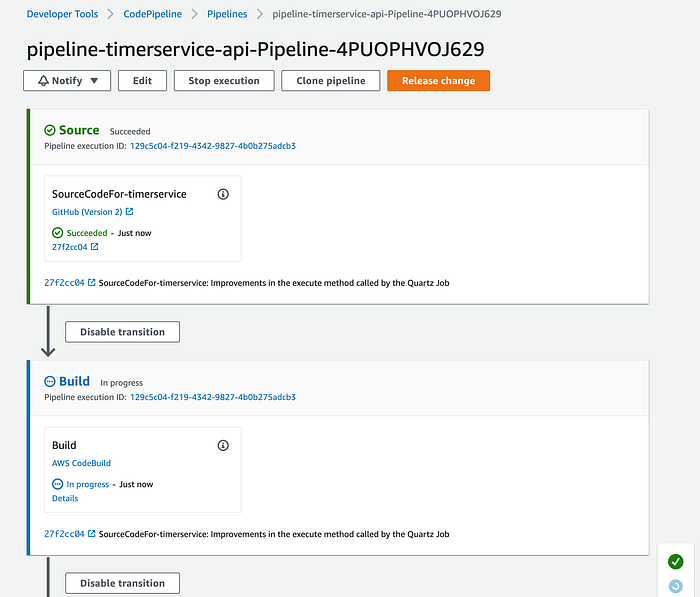
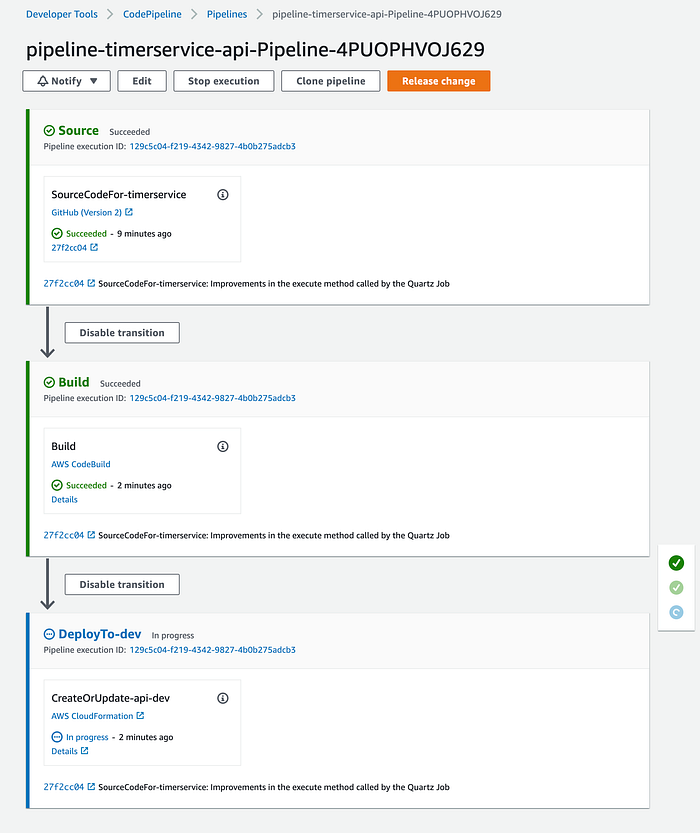
After a few minutes, our “Build” phase must be executed successfully:
In the “Build logs” section of the CodeBuild service, we can see the final logs indicating the successful generation of the “infrastructure” directory as an output artifact needed by the next phase (the Deploy phase) of our pipeline:
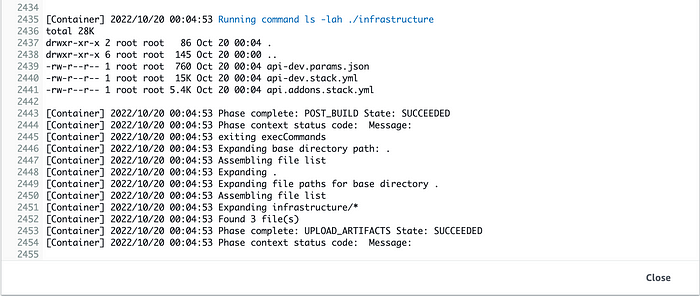
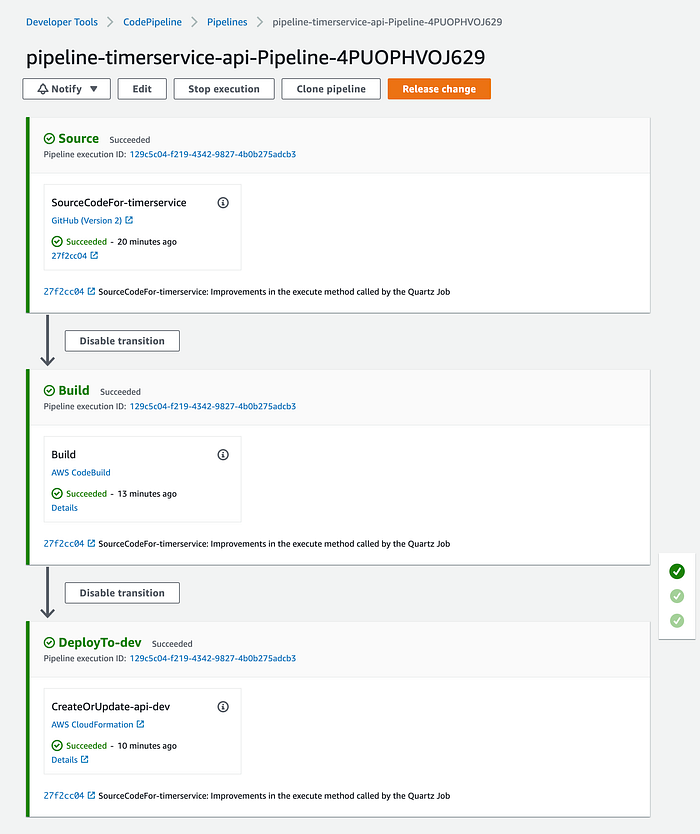
And after a few minutes (again), the Deploy phase of our pipeline is executed successfully:
Now, let’s deploy our Timer Service App but this time using the endpoint of our API Gateway. So, update the “environment.dev.ts” file with the API endpoint:

Then, build and publish the Ionic/Angular application locally:
# npm run-script build-dev
# http-server www -p 8100
The last command shows the available local endpoint to access the app. So, copy one of them and paste it into a new browser tab and login into the application:
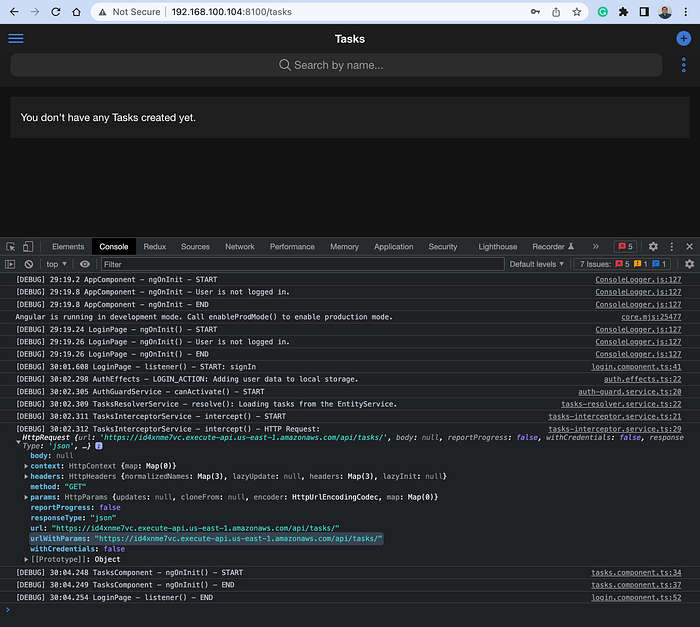
Notice in the “Console” tab of the browser’s developer tools that we are using the API endpoint of our service on AWS. But before creating a new task, open a new terminal window and execute the following command at the project’s root directory:
# copilot svc logs   \
  --name api         \
  --env dev          \
  --since 1h         \
  --follow
This command connects with the ECS cluster on AWS and prints the logs provided by the Timer Service application. The “since” flag retrieves the records from 1 hour before the command execution:
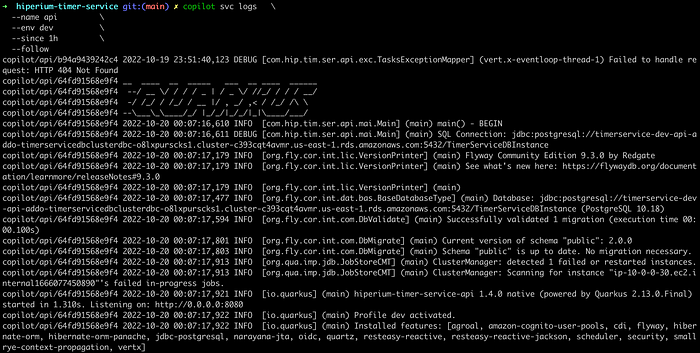
Now, create a new task using the Ionic/Angular app:
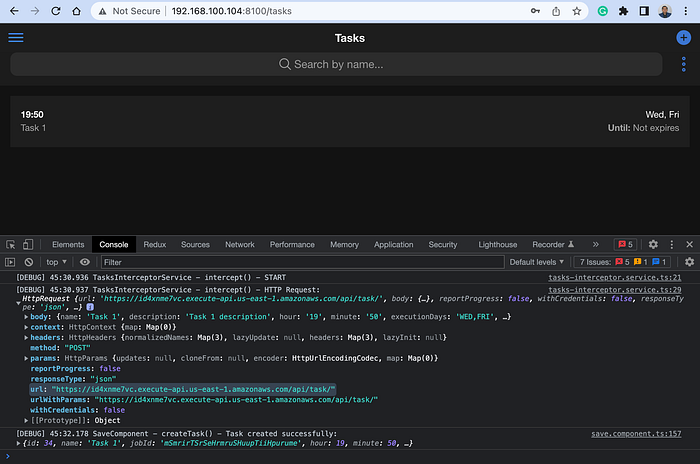
Notice that we’re still using the API endpoint on AWS to interact with our backend service. And in your terminal window, you must see the log messages indicating the creation of the new Task and Quartz Job:

And after a couple of minutes, our Task must be executed by the Quartz framework, and we must see the logs in our terminal:

Notice that the log messages have the same structure we defined before pushing the changes to GitHub and running the pipeline on AWS.
So that’s it!!! Now we can define and deploy a CI/CD pipeline on AWS for our Timer Service application. The following tutorial will create a multi-account environment on AWS and associate a CI/CD pipeline for each AWS account (development, staging, and production).
I hope this tutorial was helpful, and I’ll see you soon in my next article.
